
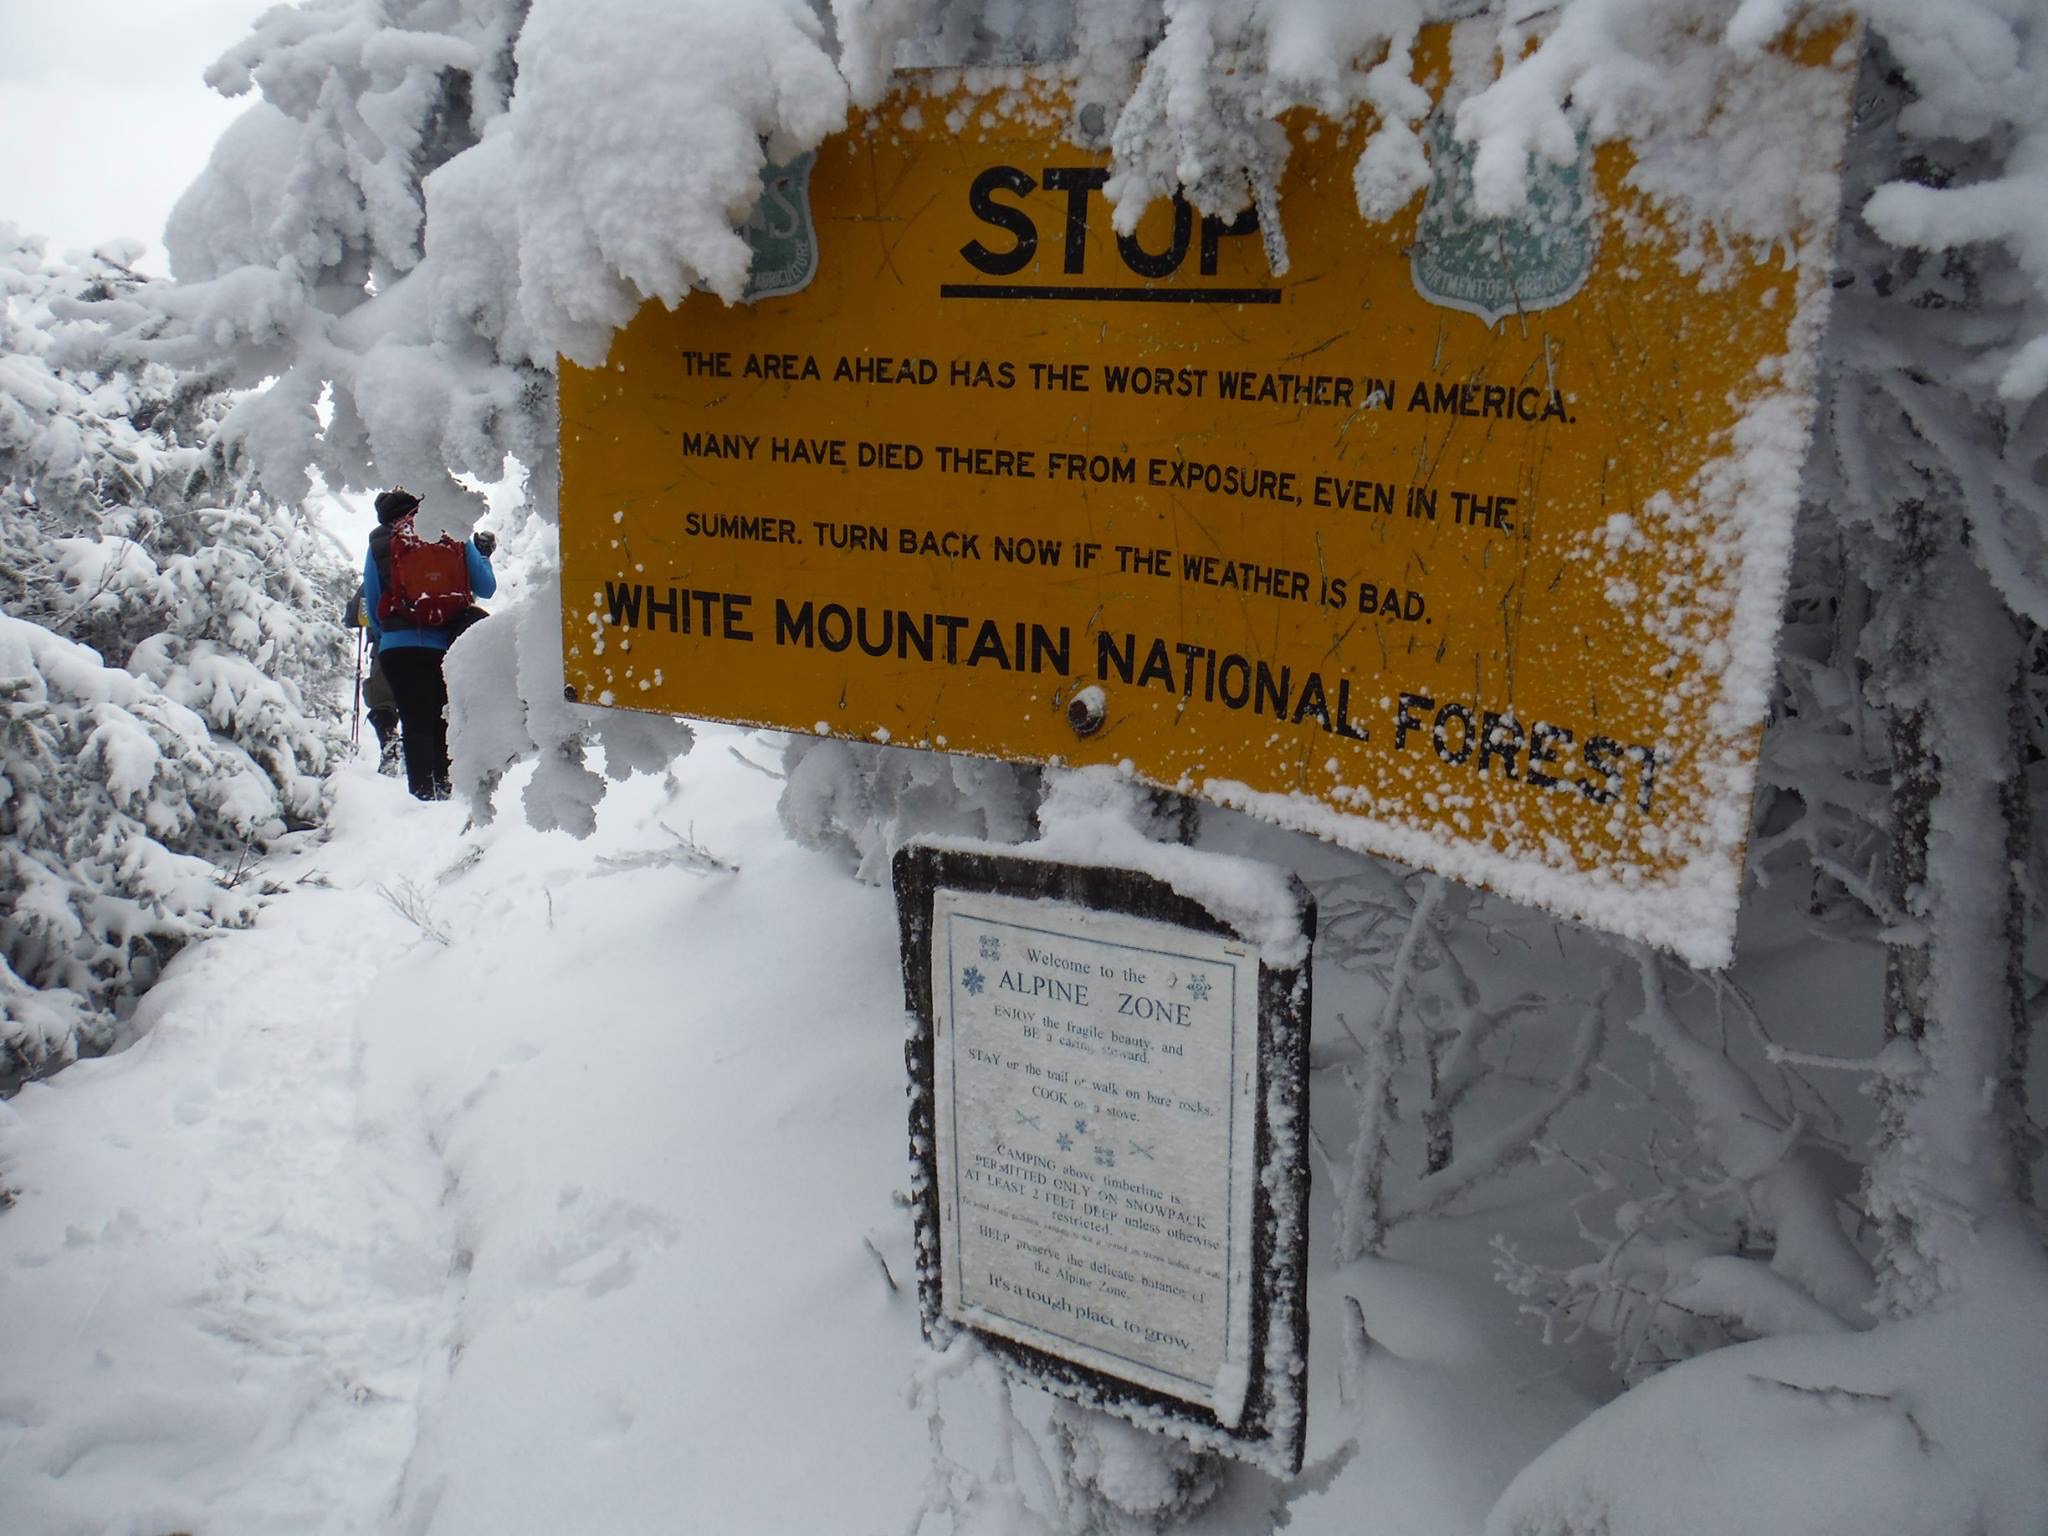
 Tired of the trees, you find you’re ready to bust out of the krummholz and explore some of the summits located in the alpine zone. But you’re a little uneasy about it. You’ve heard the stories, read accounts of people’s dying days, and there before you, right next to the trail, a sign warning of the perils that can lie ahead. We won’t lie and tell you to disregard the verbiage. It is a completely different world up there and it’s governed by a different set of rules.
The following randomly-ordered 22 Winter Alpine Travel Tips — based on logic, careful observation, and trial and error over the years — will better prepare you for this next step in winter hiking and mountaineering.
- 1. Elemental Exposure:
- Above the trees exposure to cold and wind (and UV light) are the greatest dangers. The air moves quickly and feels colder. Consider this when choosing the protective clothing, like hardshells, you will wear.
- 2. Facing the Wind:
- If you’re headed up the way you will come back and the wind is to your back, be sure to periodically turn to face the wind. Ask yourself, can I return in this?
- 3. Good Colors:
- It’s a good idea to wear brightly colored outer layers since they show up better during periods of low visibility: lime green, hunter orange, bright blue, Redline red… all fine choices.
- 4. Weather Trends:
- In a nutshell, If the weather is marginal but getting worse, going on is ill-advised. And conversely, if it’s marginal and clearly improving, it might green-light your continuation. Maybe.
- 5. Decision Making:
- The best piece of equipment you could possibly have is kept under your hat. Your brain. Use good judgement up there. If you feel you might not, or can’t, go with someone who will (or hire a guide… had to throw that in).
- 6. Trekking Poles:
- We see a lot of people walking around Mt Washington carrying ice axes. They look cool, but on windy days also look like they could use trekking poles. There are times and places for axes on the mountain, but the best tool for the job in the wind-blasted alpine zone are often those lowly poles.
- 7. Carrying Cord:
- A rope or cord can be useful for navigating in low visibility. The person in the back holds the last known position. The person in the front, with a rope or cord attached, sweeps/seeks the next verifiable position: cairn, wand, sign, or known feature.
- 8. Rock Cairns:
- Above treeline stacks of rocks called cairns — situated roughly every 50′ on properly marked trails — are used to mark the routes. It is amazing how these stand out from natural rock formations, when they poke above the snow. In some places, like the final three-tenths of the Lion Head Trail, though, cairns may be completely covered in snow.
- 9. Cleaning Cairns:
- Cairns can be completely caked in rime ice and near impossible to see in whiteout conditions. White on white, in a whiteout. On an out-and-back route, cleaning the uphill side of these cairns with an ice ax can make them more visible on the way back.
- 10. Using Wands:
- A bit of dark or bright duct tape attached to a two-foot bamboo garden stake will stand out fairly well in a whiteout. Place these in the snow, about one every 50′ like the cairns, and follow them back the same way.
- 11. Rimed Signage:
- Rime ice is a major problem at times. It will completely coat everything the clouds touch, especially the windward aspect of objects. This includes cairns, well-spaced wands, and even the limited signage available up there. An ice ax can clean the sign maybe making it readable.
- 12. Two Goggles:
- As noted, rime ice can be a difficult problem to overcome. It builds fast on everything, including your goggles quickly robbing you of your sight. This is a huge problem. Having a second set of goggles at the ready means you can change them out (putting the rimed pair in your jacket to thaw).
- 13. Map and Compass:
- These two essential items should be at the ready in the mountains and knowledge of how to put them to use paramount. As a guide I carry a “cheat sheet” which is a blown-up section of map with predetermined bearings, times, and distances noted that I can follow with a compass.
- 14. Smart Phone:
- I carry a cell phone on the mountain. Fully charged, stored warm close to my body but protected from moisture, put “airplane mode” to conserve juice. Unless I need to use the phone to call 9-1-1, that’s where it stays. 9-1-1, by the way, may be reached with zero bars and zero “g” since 9-1-1 repeaters are on non-cell towers, too.
- 15. Global Positioning:
- A GPS is another battery-consuming device that may or may not be available to you when needed. While these devices are amazing with their in-built cartography and accuracy and can be super useful (often used in Search and Rescue), they are best thought of as backup.
- 16. Hand Warmers:
- There are many tricks and tips for warming up your hands, most notable are exercise (especially upper-body from the shoulders), maintaining good circulation, even centrifugal force. These are the best techniques. Some rely on handwarmers, we even carry some, but they often don’t work.
- 17. Face Protection:
- In addition to goggles, protecting your nose, cheekbones, and chin from frostbite is high on the list, but care must be taken as goggle fogging is a huge problem. We prefer a thin upper face covering (the FaceGlove) coupled with a balaclava to mitigate fogging while still being protected.
- 18. PLB or Spot-like Device:
- If your small group is headed someplace fairly remote, having a way to signal and communicate with the outside world can be pretty important (but realize these devices have their limitations). A Personal Locator Beacon (a type of EPIRB) can request help. A Spot-like Device (InReach, etc.) can do more in terms of sending non-emergency communications.
- 19. Soloing and Splitting Up:
- There seems to be a common thread among many backcountry near misses and losses of life. That thread is people are going alone or groups are splitting up. This is a really bad idea that should be avoided. The specifics of why vary a lot, but the oft-repeated outcomes seem clear.
- 20. Avalanche Dangers:
- In areas with no trees, where snow is angled between 20-55°, it can avalanche as either point-released slough or as slab. In any case, take time to understand avalanche factors and terrain to better manage this danger. Carry avalanche gear (beacon, probe, shovel) where it might be needed.
- 21. Postholing:
- While using crampons on hard packed snow and ice is quite effective, much of the time snowshoes or skis (if properly skilled) can be a much better choice. Foregoing the entire trail etiquette argument, postholing can exhaust a person.
- 22. Unknown/Unexpected:
- Not trying be be a downer, but in such an unforgiving realm, you must anticipate the unexpected. Broken equipment, injury, sudden weather. Anything. I once had a crampon center bar suddenly break. I was walking on snow. Thankfully I carry a spare. Bring your “A” game to the Alpine Zone. It’s required equipment.
- Bonus Tip. Happy Gloves Mean Happy Hands:
- A friend of Redline Guiding, Dolores, noted in a Facebook comment that we missed an important glove management tip. Since it’s something we actually teach in our winter skills course, we must agree. It is an oversight, one that must be corrected. Here it is: when taking your gloves off, such as during a break, keep them in your jacket. They won’t get cold, full of snow, or blow away if they are protected. Also, if it’s super cold, wear super thin liners, even nitrile gloves, under your regular climbing gloves to limit skin exposure.