- Further Reading
- FAQs about Mt Washington »
- Learn more about its weather »
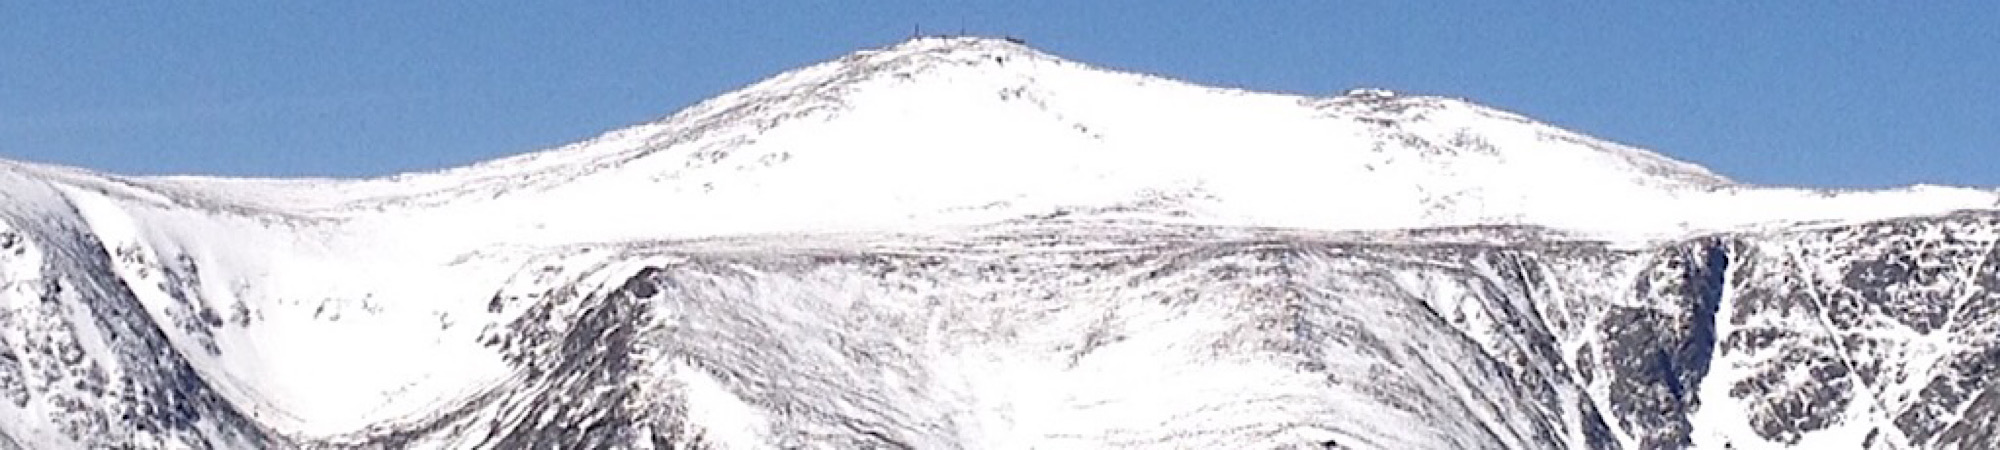
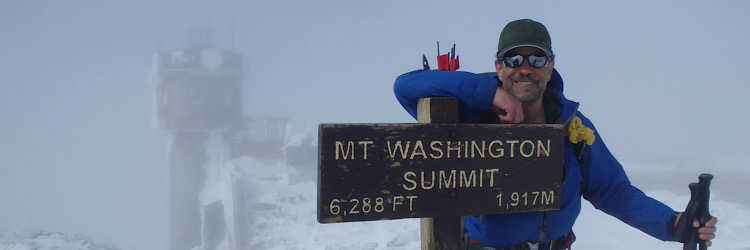
Mt Washington is the tallest mountain in the Northeast, featuring a large swath of alpine tundra upon which rare plants reside, and it is home to some incredible weather. To this day the mountain holds the record for the fastest man-observed overland wind speed — clocked at 231 miles-per-hour at its summit. Nasty weather on this battered peak is serious. This famed New Hampshire mountain is only 6288ft (1918m), but due to its prominence and specific location, it punches like a professional. Numerous lives have been taken on its shoulder and surrounding peaks, so accessible, its dangers so often underestimated. As guides, we want to show you what it’s like, then lead you back home. Please note that this is a winter endeavor. For summertime and three-season attempts, see our Hiking page, and do note that by “winter” we mean winter conditions on the mountain which will extend into the shoulder seasons of spring and fall.
This mountain may be winter-climbed by various means, from hiking trails (which we lead) to snow- and ice-filled gullies (which we also lead), but this specific trip, a two-day event to allow for a training day, is attempted via the Lion Head Trail. And throughout most of the winter, this is by way of the “Winter Route” of this steep trail. The regular trail closes as soon as avalanche dangers on a swath which crosses that trail reach a certain threshold based on depth and snowpack. The Winter Route saves climbers from a fair amount of hiking, but the significant elevation gain (~4200′) remains. This makes for a steep route and it takes a good 6-8 hours more or less to get it done. The Winter Route is an excellent place to apply some of the techniques learned the day before.
Itinerary
Day One:
MORNING SESSION: You will meet us at our Basecamp in the morning. There you will participate in a half day Winter Skills course to learn about planning, preparation, packing, the three systems (you, your clothes, your gear… and more). Bring your gear if you have it, as it will be inspected. This class will make sure everyone is on the same page and dialed in and organized as much as possible. Please note, as an option, this half day class may be taken in advance of day one as a virtual option. Note your interest in this when booking.
AFTERNOON SESSION: After the morning class is done and all the gear is ready, the team will normally go out to lunch, get takeout, etc. (coordinate with your guide). After lunch the team will head out to one of several locations used for crampon and ice axe training, self arrest, and a few other goodies taught in our basic half day Mountaineering Skills course.
THAT EVENING: Start eating right this evening if you haven’t been. Avoid experimental foods, drink lots of water, and avoid alcohol. Dry anything that you will need in the morning. Also, ensure you’re well rested. The excitement may hamper this effort so go to bed early.
Day Two:
FIRST THING: This is where the excitement really starts. This is what the training was for. The objective: the summit of Mt Washington. Have a good breakfast but don’t go hog wild on the bacon. Also, limit your coffee intake and avoid breakfast drinks.
MEETING AND GOING: Meet time is 7:00am at Basecamp. Earlier is possible and the guide may request this, but that will depend. Our guides are well trained and often make program tweaks for weather reasons, or whatever. After a quick gear summary and last minute check of gear, layers, equipment, food, water, etc., the team caravans to the trailhead located at the Pinkham Notch Visitor Center roughly 15 miles away. Once there the teams once again does a last-minute gear check, either outdoors or in the AMC’s “pack Room” if it’s open, then hit the trail.
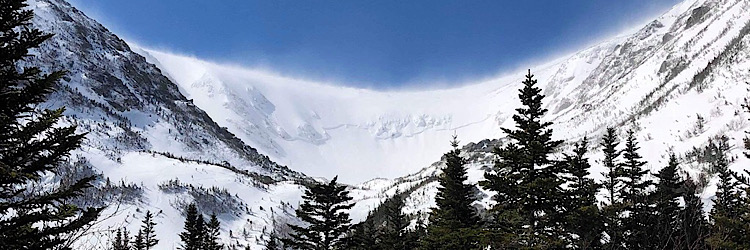
TEN MINUTES LATER: After ten minutes of hiking, the team will generally stop at the Crystal Cascade. The reason is to make small layering adjustments, especially needed by the guests who started warm and comfortable at the start. (It’s best to start off cold at the trailhead.) It’s also a good time to check out the waterfall and reveal to the guide how you will descend hours later as you come down the steps.
THE STEADY SLOG: From there the team will move to the Huntington Ravine Trail junction about 1.2 miles away. This is the longest single leg of the trip. After which the team will take a 10 minute break. Long enough to pee, drink, eat, and adjust the layers if needed. And speaking of layers, once stopped, you should don a puffy jacket and put your gloves in it to protect them and keep them warm. We may remind you not to block the trail. The puffy jackets will probably come off before moving again, but on very cold days there are alternative actions.
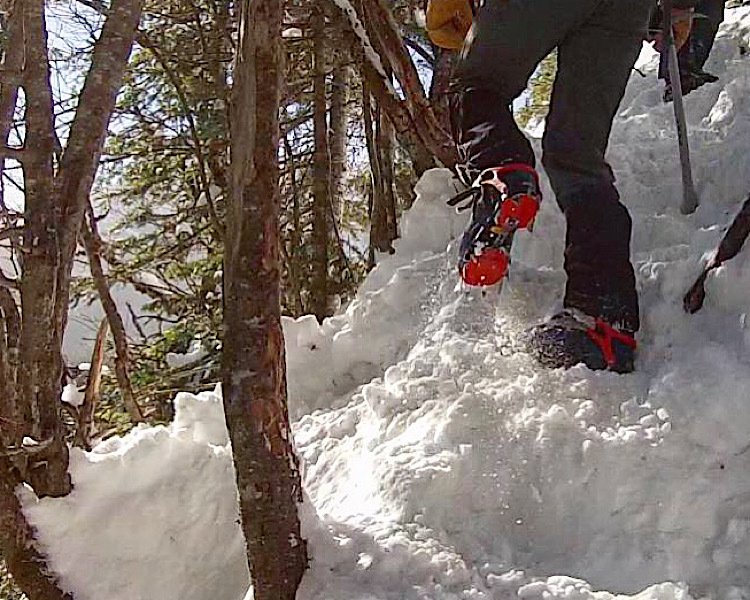
THE FIRE ROAD: The next stop is about half mile further on: the “Fire Road.” The team will turn down this road going as far as the start of the Lion Head Winter Route — maybe 100m. We stop here again (or at a spot further in the woods on really cold and breezy days). At this point the guide will advise climbers to stow their trekking poles and light traction, if worn, and take out their ice axes. Also this is the time to put on your crampons, helmets, and harnesses if not already on. This is also a good time to put on waterproof climbing gloves.
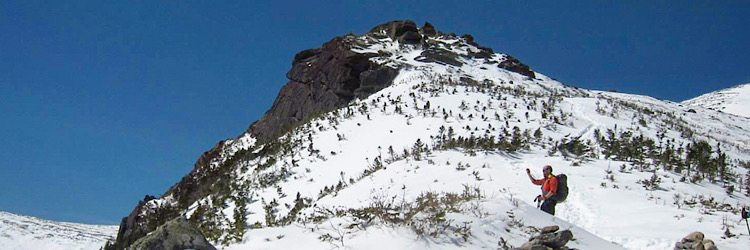
THE STEEPS: The steepness begins a little ways in and doesn’t let up for about four-tenths of a mile. Of all the steep bits, four sections or “pitches” are exceptionally so. Often our guides will set a handrail for the descent in these sections. Knowing how to use the rope is part of out afternoon training session so participants know what to do.
TRANSITION TO TREELINE: Next stop is treeline. Here the guide will access the situation. We have been turned back at this point, but usually we can go on at least to Lion Head itself which is another four-tenths away. At this break more food and water will be quickly consumed, and the team will layer hands, faces, etc., bracing for the weather. Facegloves, mitts, goggles, balaclavas, etc., some or all may be worn. As well as more or different layers and hard shells, as needed. The weather with determine it all. Your training will inform you. And your guide will advise you.
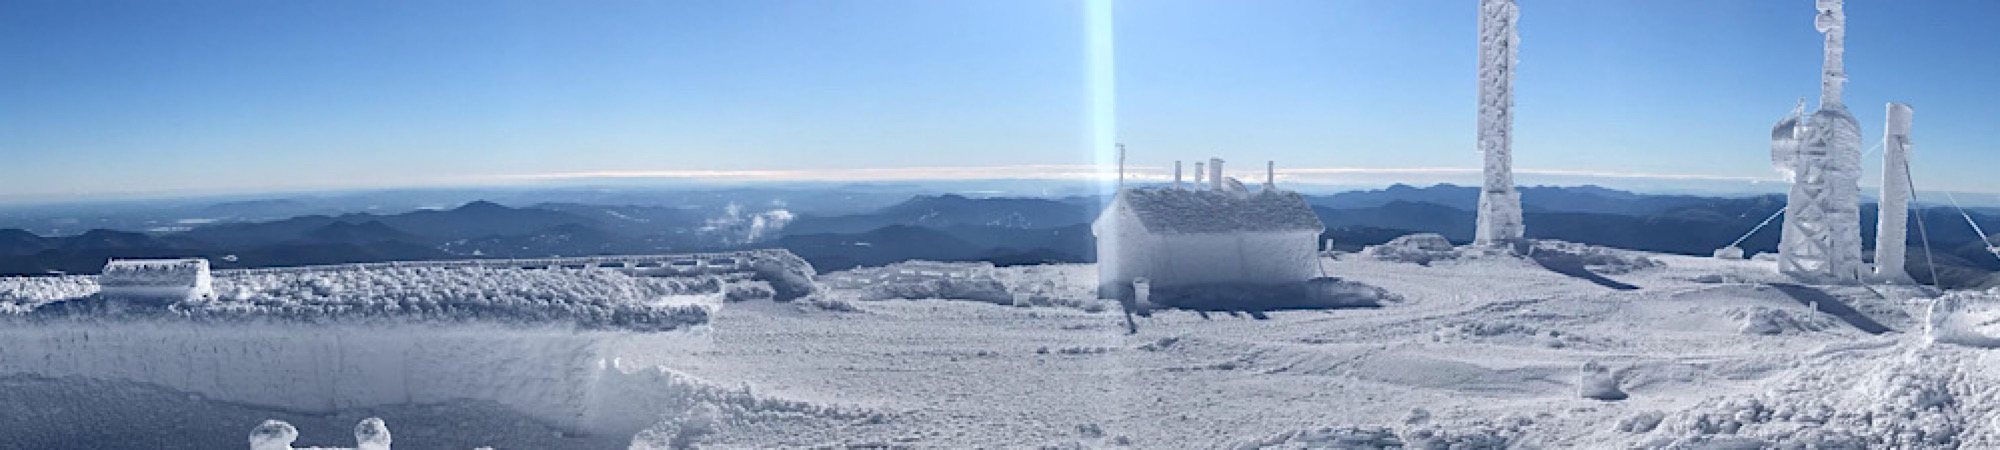
THE ALPINE ZONE: From there breaks are brief, food for fuel, basic maintenance, the cold will certainly factor in. Lion Head goes, and if the weather and weather trend allow it, the team will head across the southeastern snowfields toward “split rock” then onto the cone, again on the Tuckerman Ravine Trail. From the junction it’s a slog, but the heavy lifting is almost done. Three-tenths to the auto road, one tenth to the summit from there. If time allows — there is always a turnaround time established independently by the guides each day — the team with take photos then get out of the wind to eat, linger for a bit, then leave.
DESCENDING AND ENDING: The team will generally descend in one go only stopping briefly to delayer and change out gear as needed. The descent usually goes a lot faster, but that can depend. In any case the goal is to get everyone back down before it gets dark. The guide may then either collect the gear and part ways then, or request this be done at Basecamp where there is more space. Guest items (a laptop, street shoes, etc.) may be securely stored at Basecamp so may need to be retrieved anyway.
Other Information
Equipment and Gear
In addition to the normal gear required for mountaineering (see details on Mountaineering page) this specific activity will require this specialty gear.
- Ice/snow axe.
- Mountaineering boots.
- Mountaineering crampons.
- Climbing helmet.
- Mountaineering harness.
- Avalanche beacon (if needed).
- Avalanche shovel (if needed).
- Avalanche probe (if needed).
For all gear options, including Alpine Ready Packs, see the master list below.
Rental Gear Master List - Click to Open
Rental Gear Master List - Click to Close
- General Rental Gear Pricing
-
- Empty Backpack: $15/person/day.
- Headlamp w/ Batteries: $5/person/day.
- Trekking Pole Set: $5/person/day.
- Bushwhack Kit (Compass/Glasses): $5/person/day.
- Food and Water (Lunch Kit): $15/person/day.
- Summer Clothing/Layers Pricing
(NOTE: By “Summer” we mean warmer, summer-like conditions, not the season.) -
- Fleece (Midlayer): $5/person/day.
- Puffy Jacket (Midweight): $20/person/day.
- Hardshell Set: $35/person/day.
- Light Gloves: $5/person/day.
- Climbing Gloves: $10/person/day.
- Winter Clothing/Layers Pricing – Add to List Above
(NOTE: By “Winter” we mean colder, winter-like conditions, not the season.) -
- Puffy/Parka (Heavyweight/Winter): $25/person/day.
- Hardshell Set: $35/person/day (Gaiters Req. w/ Crampon Use).
- Mitts/Overmitts: $10/person/day.
- Watchman’s Hat: $5/person/day.
- Balaclava: $5/person/day.
- Face Protection (Faceglove/Mask): $5/person/day.
- Ski Goggles: $5/person/day.
- Gaiters (Winter): $10/person/day.
- Winter Rental Gear Pricing
(NOTE: By “Winter” we mean colder, winter-like conditions, not the season.) -
- Light Traction: $10/person/day.
- Mountaineering Snowshoes: $15/person/day.
- Mountaineering Crampons: $15/person/day.
- Climbing Helmet: $5/person/day.
- Ice/Snow Axe: $10/person/day.
- Whippet: $10/person/day.
- Alpine Harness: $10/person/day.
- Winter Technical Gear Pricing
(NOTE: By “Winter” we mean colder, winter-like conditions, not the season.) -
- Ice Climbing Crampons: $15/person/day.
- Technical Ice Tools: $15/person/day.
- Climbing Harness: $10/person/day.
- Mountaineering Boots: $25/person/day.
- Avalanche Beacon: $25/person/day.
- Avalanche Probe: $10/person/day.
- Avalanche Shovel: $10/person/day.
- Avalanche Kit: $40/person/day.
- Summer Technical Gear Pricing
(NOTE: By “Summer” we mean warmer, summer-like conditions, not the season.) -
- Climbing Helmet: $5/person/day.
- Alpine Harness: $10/person/day.
- Rock Climbing Shoes: $15/person/day.
- Climbing Harness: $10/person/day.
- Chalk Bag w/ Chalk): $5/person/day.
- Personal Flotation Device: $10/person/day.
- Backpacking Gear Pricing
-
- Sleeping Bag (Rated): $20/person/night.
- Sleeping Pad (Foam): $5/person/night.
- Sleeping Pad (Inflatabe): $15/person/night.
- Tent (1-2 People): $20/person/night.
- Tent (3-4 People): $30/person/night.
- Stove w/ Fuel: $15/person/night.
- Other Gear-Related Pricing
-
- Gear Insurance (Regular/Hiking): $10/person/day.
- Gear Insurance (Alpine/Winter): $20/person/day.
- Gear Insurance (Backpacking): $30/person/day.
- Gear Insurance (Alpine/Winter Backpacking): $40/person/day.
- Outsourced Gear (Pick Up Fee): $40/person/day.
Transportation
Guests are responsible for their own transportation, to our location, then subsequently to the training grounds and mountain itself, but during normal times incidental car-pooling is common and encouraged. It saves gas and reduces pollution.
Meals and Lodging
Guests are responsible for all of their meals and lodging. Take note, however, our Alpine Ready Pack may come complete with food for the day (a $15 value). Other meal options from freeze-dried meals to restaurant recommendations. For lodgings, there are many in the area, B&Bs, Joe Dodge Lodge, hotels/motels, campgrounds, and more. Even some free sites on USFS land.
Gratuities
Our guides graciously accept gratuities. After all, your life is in their hands on the mountain. A tip of 15-25% is a common way of showing your appreciation of the guide’s skills and decision-making. Of course cash is greatly appreciated.
Specifications
- The difficulty of this activity is as requested though is inherently tough.
- This activity has a 1:4 guide/guest ratio.
- The maximum group size is 8 with 2 guides.
- For parties larger than 8, please contact us.
Winter Program Pricing
| Two Day Winter Mt Washington DT Pricing | |
|---|---|
| For one person | $575 |
| For two people | $375 each |
| For three people | $350 each |
| For four or more | $300 each | Winter Mt Washington DT Premiums |
| Sunrise/sunset summit | Add $100 to total |
| Sauna/Ice Bath (Info) | $35 per pass/person |
| Make it private | INCLUDED |
Ready to do this? Book it Now!