
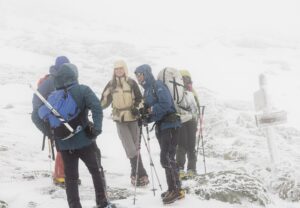
 They would come up to us guides, trying to stay composed, but their eyes would be wild with mild terror edging toward panic. “My hands/feet/whatever are so effing cold… please help me.” Experience with this sort of thing as guides meant we understood precisely what was going on and how to solve it. But it was never done in the way our guests would think we would do it. Instead of sharing in their building panic and breaking out the hot packs or bulky mitts as they figured we’d do, or calling in for a helicopter as they hoped we’d do, we simply promised that we would deal with their issue in a few minutes, to chill out so to speak, and that we needed to move a bit first, to get out of the wind, to get out of this spot, whatever. We spoke truthfully, but it was also a bit of a distraction. They would follow. They would allow us to override their building panic… at least for the time being. Just long enough. Given this, we could help.
 Their hands/feet/whatever, you see, were always cold after taking a break — even out of the wind — on the winter summit of Mt Washington. So we would move. Hiking for about five minutes, even down the mountain, seemed to solve the problem. We’d call over to our once-panicked guest and ask: “Hey, how are your hands/feet/whatever?” To which they would reply: “Huh?” “Your hands/feet/whatever,” we’d say. “Remember?” Their once-panicked eyes would light up with comprehension behind their goggles and reply: “Oh, yeah, they’re fine.” We realized they had forgotten all about their cold hands/feet/whatever. Feeling like blocks of ice their minds cannot imagine getting warm without serious intervention one minute, to be just fine a mere five minutes later. It’s simple. The key of course is that ability to move. In other words, to be a fed and functional, heat-producing hiker: uninjured and healthy. To be capable.
The takeaway from what we’ve told you so far is that staying warm is relatively easy if one wears adequate and proper layers for the amount of cold, after factoring in their movement-generated heat. So let’s a take a look at these things in greater detail.
The Proper Layers
 This article is as much about staying cool as it is about staying warm, in truth. If it wasn’t, if staying cool wasn’t a challenge in any season, the solution in the winter would be to simply add layers. In reality, however, we will often remove layers in the winter, even in sub-freezing temperatures. If we didn’t, the layers that made the cold bearable at the trailhead before we started exerting ourselves, would make us overheat ten minutes in. In no time this heat would begin to sap our energy and make us sweat. Sweating, in fact, is virtually unavoidable — hiking is hard work, particularly in the winter — but we don’t want to overdo it. After all, in essence, staying dry is key to staying warm.
Due to the inevitability of perspiration, the materials we use for layering are very important to our self care. Critical, in fact. To begin we will strongly advise cotton and denim NOT be used at all. If you haven’t heard, “cotton kills.” Cotton, you see, will absorb sweat, filling once-empty air spaces with water, which will conduct heat away from the body rapidly as well as contribute to evaporative cooling. The material will retain this water, making the wearer very cold over time. With continued cold sans intervention, hypothermia could ensue and this could lead to death.
Common Layering Materials
Now that we’ve told you what you shouldn’t wear, let’s follow it up with what you should wear. If not obvious already, the fabrics you wear need to handle a moderate amount sweat at the very least. Either the material will have to literally move sweat away from the body altogether, or it will have to continue to perform as an insulator while damp. Four materials are at the forefront:
- The first will be performance fabrics such as “wicking” materials commonly developed with plastics like polypropylene. The fibers of this type of material inherently don’t absorb moisture. They’re plastic. This material can be produced in such a way, however, that it actively wicks moisture away from the skin using capillary action and other clothing Voodoo, much of it proprietary. If you’ve never seen this in action, it’s pretty amazing; you’ll look down and see sweat forming on the outside of your baselayer top, for example.
- The second will be wool. Wool naturally retains tiny bubbles of air. This happens at the microscopic level, but it’s quite effective at creating a barrier of dead air space. Will damp wool be as good as bone-dry wool? No, but it won’t become worthless like cotton either. Some will wear baselayers and mid-layers made of wool, but keep reading for more on this. Speaking of wool, fleece is another material but care must be taken with its use. Fleece is a synthetic version of a natural wool fleece which resides next the sheep’s body. It’s very warm but the synthetic fleece won’t perform well while wet. Thankfully it dries quickly, is super light, and packs well when not in use.
- The third material is goose down or its spun-poly substitutes. Goose down is preferred since it’s very warm trapping lots of air in its loftiness while being extremely lightweight. Down is variably compressible, the higher grades of which allow for better re-lofting performance after compression. The rating numbers relate to this, specifically. For instance “800 fill power” down re-lofts after compression better than “600 fill power.” The number relates to this quality alone, this ability to spring back, not its quantity as some assume. The higher the number the better. Of course this is referring to dry down only. Wet down tends to mat and become worthless. In the mountains we suggest investing in “treated down” meaning it’s chemically hydrophobic. This ability to repel water helps avoid matting.
- The final material doesn’t necessarily insulate but rather serves as a barrier against wind and rain. The shell layer as it’s known is some sort of plastic or synthesized rubber. Except in the most basic of garments, however, this layer is generally a composite of very high-tech, very sophisticated materials allegedly allowing the composite to “breathe” so as to prevent the build-up of moisture. An example of this molecular exchange material would be GoreTex. While we certainly appreciate the science, we find that these “hard-shell” materials often feel too hot requiring us to vent (if possible) and/or to slow our pace. Many hikers prefer a “soft-shell” for enhanced breathability, warmth, or comfort, though at the expense of reduced wind blocking and waterproofing.
The Baselayers
Many hikers pretty much live in their baselayers throughout the winter. We get it. They’re comfy and warm. When it comes to wearing baselayers while hiking we personally end our wool wearing at our ankles opting for higher performance wicking materials to get moisture away from our skin everywhere besides the feet. Some prefer wool, and we support this as a personal choice, but we recommend it only if you sweat moderately and do want or need the extra warmth wool tends to provide. Thus we are more attracted to the proprietary wicking polypropylene garments. They can be more costly and do tend to hold onto body odor with more tenacity — and they’re less environmentally friendly due to the presence of microfibers from laundering — but we are attracted to their amazing performance.
On many days, these baselayers will be what we hike in, particularly on our upper body. It may be 10- to 15-degrees Fahrenheit, but we will feel great, watching our sweat form on the surface of our top as we progress up the mountain. On our bottom half we will generally wear some sort of soft- or hard-shell. That said, women will often wear heavy baselayer tights on their lower body foregoing the shells altogether. Though if this describes you, we’d suggest having some ready along with some gaiters.
The Mid Layers
We will sometimes stack our upper and lower baselayers in winter, then top these layers with a soft- or hard-shell layer directly skipping the others, but mostly on the lower body as we find that region is easier to manage. Women, however, may be better served by topping their lower bodies with a down or other insulating skirt. We’ve heard many positive reports regarding a skirt’s warmth — protecting women’s seemingly most cold-vulnerable region — as well as its convenience when having to urinate.
We find managing the upper body, unlike the lower half, requires more fiddling and fussing. More layer management is needed to optimize. This is where having a mid-layer or two can be ideal. This can range from a long sleeve shirt, hoodie, fleece, even a soft-shell jacket. Ideally this layer will feature a hood, but that’s not always the case. Often times, our layering on-mountain will stop at this level, unless we have to stop hiking. In which case our insulating layers will be put into service. We’ll don our “puffies.”
The Insulating Layers
Next up are the layers we will need if we begin to cool down while wearing the layers noted above, provided they haven’t lost effectiveness due to being sweated in too extensively, in which case even more self-care will be needed to ensure further layering up won’t exacerbate the matter leading to even more wet layers. It can become a vicious cycle. The insulating layers should really be donned in only two particular circumstances.
The first is during routine rest breaks, as mentioned above. In fact, in the winter, throwing on a down “puffy” jacket is one of the first to-do items when you stop. This layer should reside pre-lofted at the top of your pack right along with hard-shells (rain protection), food, water (depending on delivery method), and any other must-haves not stored in your pockets.
The second time wearing a puffy should typically occur is if you have to make an extended stop. In which case, even more self-preservation steps may be needed. For anyone in more extreme conditions, or while winter camping, puffy pants might also be considered. Not generally for day use, but as an emergency option they can be a leg-saver.
The Shell Layers
Lastly we have the shell layers. For the most security, provided your legs don’t sweat a lot, it is possible to top one or more baselayers with hard-shell pants or bibs and call it a day. We often use the latter providing sound protection from the chest down. Some will prefer soft-shell pants over a baselayer saving their lower body rain/wind layer for later, if needed, storing these pants in their pack. There isn’t a right or wrong here, but prepare to experiment and learn what seems to work best for you. Even women who have opted for the tights/skirt combo may at times want proper shells for added elemental protection.
When considering shells, think about venting, especially as it concerns the upper body garments. A good hard-shell jacket should feature “pit zips.” The lower half should also offer vents with water tight zippers along the side of the leg, preferably for the full length making it easier to put them on while wearing boots, or even crampons. Please note, however, once your side zips are open, the protection is reduced greatly. You don’t want to be the person who steps off trail only to fill their pant legs with snow.
Protecting Our Extremities
One of the biggest challenges isn’t keeping our core warm — even though from a life-expectancy perspective it is paramount. Rather it is protecting those bits that hang out — our appendages, our digits.
Protecting the Feet and Toes
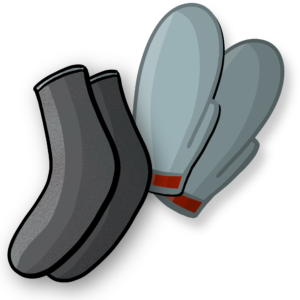
 In the name of warm feet (short of using toe warmers), we like to wear wool socks. Just a single pair is fine, rated for the season, with a suitable back-up pair packed along with two hospital vomit bags. The opening rings in these bags can be removed with ease and the bags used as durable dry sock “condoms” for use in wetted-out boots, instead of grandma’s recommendation for flimsy bread bags. Bless her heart. We prefer wool over other materials for our socks because foot sweat is a virtually unavoidable issue. Even using an antiperspirant on your feet, which actually helps, doesn’t stop the sweat completely. Wearing wool socks means that we can keep our feet warm even as we perspire normally, as long as we don’t overdo it.
On extremely cold days some hikers will be tempted to add a second pair of socks. We generally don’t suggest doing this, however. For one thing the added material can compress more than normal rendering it less effective than normal, counter to your very efforts. Moreover, doubling up will also reduce the space in boot and thus compress the foot more which can lead to reduced circulation. Having good circulation is paramount. Just ask those suffering with Raynaud Syndrome.
Some hikers like to wear thin liner socks. If these socks have the ability to wick moisture away from the feet and put it into a wool layer, their use is probably worthy of investigation. Personally, we prefer just the wool layer. We feel as if the liners are “slippery” and can sometimes have a cold feel, but this is probably dependent on the fit. Experiment for yourself.
Over the socks we like a nicely insulated mid-height boot. We suggest either a winter-rated hiking boot with about 400 grams of insulation (though some will argue that 200 is fine for them) or a mountaineering boot. Most of the guides here personally use single and/or double-wall leather mountaineering boots — “double” meaning there are removable inner booties. Double plastic boots, like ski boots, are also available. Which boot our guides and guests will wear, specifically, depends on the activity and how cold it’ll be. If backpacking in winter, however a “double” boot is necessary so you can keep the booties in your sleeping bag overnight. If this isn’t done, the booties and boots can freeze and may even become impossible to put on!
To protect your feet further, your winter boots should be waterproof, treated if leather, and gaiters should also be used. Either those integral to your pants or external gaiters. It’s not unheard of to use both, especially if new to using crampons (the gaiters help prevent rips and tears) or if there is a deep layer of new snow. Gaiters can help keep snow, debris, and water out of your boots. Think of foot protection as an incredibly important system in and of itself.
Protecting the Hands and Fingers
 Like the feet, these extremities are easily affected by the cold, but also, with proper layering, control is fairly simple. The challenge with protecting the hands is everything else we need them for. Keeping our hands warm really messes with our dexterity. It’s for this reason people will try to 1) minimize their handwear and, 2) wear gloves over much more effective mittens when possible.
We like to start with a liner glove of sorts often wearing them for the better part of the day unless it’s super cold, windy, or wet. For the sake of longevity (since liner gloves are thin and warm but not tough), we opt instead for a lightly insulated work, gardening, or mechanic’s glove. These are generally just as effective as liner gloves while lasting four times as long and costing a third as much.
From there we rely on a couple of different options. If the liner gloves aren’t sufficient we either cover them with a soft-shell material over mitt or don our waterproof climbing gloves. The advantage of the latter, of course, is that they’re gloves and allow us to do more with them on. When just hiking, however, gripping nothing more than trekking poles, we prefer the mitts.
We don’t stop there, either. We also carry emergency mitts in case we are stuck on the mountain or if it’s extremely cold. These large, expensive mitts are in two parts: an insulating liner mitt and a durable, waterproof outer shell. We tend to keep those components un-nested because we can mix and match as we wish. For instance, we can use our climbing gloves under the above-mentioned “durable, waterproof outer shell.” There are myriad combinations making fine adjustments not only possible, but rather simple.
The end goals are that you want to avoid exposing your hands and other extremities in extremely cold air, keeping them warm enough for comfort but not to the point of sweating, and you want to remain as dexterous as possible. Obviously some compromise is needed.
Protecting the Head and Face
 If we didn’t need to breathe and see, keeping our heads warm would be simple. Unfortunately we need to do both of these things, and believe it or not, they’re kind of incompatible. We can facilitate sight by wearing sun glasses, glacier glasses, or goggles, but as soon as we breathe, we can also fog up said eyewear. And in the winter, this fog will freeze. It’s always been a challenge, especially with goggles. Even our sweating fogs them up. Applied coatings don’t seem to lend much aid, only airflow works best. That and the diversion of our exhalation. We find using a “Faceglove” by OuterU in combination with a balaclava and googles or glacier glasses offers a sound solution to this problem. With this system, the head and neck is protected, a hat and multiple hoods can be added, and the tender bits like the eyes, ears, nose, and cheeks are protected, all while not impeding breathing.
Enter 2020, however, and a new problem arises. Now we want to impede breathing to protect ourselves and others from COVID-19. The awesome solution above doesn’t solve that matter, and honestly, it will likely be difficult as wearing anything not permeable enough like, say, an N95 mask, is going to contribute to fogging issues. Additionally, the moisture in the mask may freeze becoming impermeable. Moving forward, in stagnant air it will be important to maintain social distancing as a primary etiquette measure. For functional mask materials, a doubled-up Buff will probably serve best. This being a new thing, however, the jury is still out.
Making Adjustments
Success in layering, staying warm enough at the same time you’re staying cool enough, will require honest introspection. You should ask yourself how you feel, not just if you can get through the ordeal. Will you thrive or survive? Since hiking isn’t really about suffering, thriving should be the order of the day. You will need to tweak and adjust your layers as needed. This means that you will need to be able to access your layers, they will have to be somewhat organized, and you will need to care for and protect them — so that they will take care of you.
To do this right, practice. Adjust the ordering of items in your pack so that the first item needed will be on top. This sort of thing — being efficient on trail — doesn’t just happen. You need to make it happen. And this is particularly important when hiking with others. If you’re not able to manage your gear you may create discomfort or danger as others in your party wait for you.
“Sorry, we don’t mean to rush you, but we’re freezing to death over here!”
Coordination and Pacing
 Success in layering means to not wet out or sweat out your layers. This is all part of making adjustments. If starting to overheat, de-layer, but try to coordinate with others: “Hey guys, I want to drop a layer. Anyone else?” This question will prompt team coordination if it’s at all possible. It’s best when everyone gets on the same page. Otherwise it may be frustrating, uncomfortable, even dangerous. It’s best to figure this out early in the season on smaller hikes. That said, not everyone is meant to hike together and that is a reality.
After coordinating it’s best to act quickly and get the adjustments done. If timeliness isn’t possible, others may have to layer up to survive the break without cooling down too much. Remember, while you’re staying warm rifling through your pack, everyone else may get cold waiting.
Another option to avoid sweating too much, provided the team can handle it, would be to slow the hike’s pace. Some hikers need to change clothes upon summiting because they sweat out their layers, but their first course of action should probably be to simply adjust their pace.
Coordinated Comfort
We do want to add that it is possible to leave our puffy coats on after a break on those really cold days, but only as a planned and coordinated effort. All in the name of not suffering. It would go something like this:
- We will begin hiking with puffies on.
- We will stop very briefly about five minutes in.
- We will stuff our puffies in our packs quickly.
- We will resume hiking, now comfortable.
This works and is akin to having your cake and eating it, too.
Everything Else
 When your layering and packing is dialed in, you’re left with these other considerations about staying warm.
Maintaining Energy
One important consideration is maintaining your energy levels. This requires foods. Specifically we like healthy fats. If fats and proteins are consumed throughout the day one should not feel excessive hunger while at the same time maintaining good energy levels throughout the period — without having to resort to eating sugar-rich foods. Sugar-rich foods can provide a fast burst of energy and warmth, but they aren’t desirable and aren’t particularly healthy for continuous use.
Maintaining Hydration
Humans are mostly water so it’s important we don’t run dry, especially when exerting ourselves. Sweating, breathing heavily, our moist, warm breaths freezing into visible vapor before our very eyes in the cold, dry winter air. It’s a reminder to drink. Proper hydration leads to proper circulation, and as we’ve already discussed, circulation is key to warm extremities. Dehydrated, one will feel the cold more than others — though conversely having to pee can exacerbate the cold so hydration’s really a balance.
Exercise is Warmth
When folks train with us we tell them that they can warm their hands by exercising from the shoulders. We show a forceful punching motion toward the ground with our fists, moving from the shoulders, as if we were forcefully driving two piles into the ground. Not only is this a workout providing fast results, the centrifugal force pushing blood into the hands also helps a great deal. But it requires effort. The concerned guests we described at the beginning of this article are already doing this if they have been taught, but they are looking for a less tiring, more permanent solution. This is helpful, however, particularly in the short term.
But, What If…
 If you can’t exercise your way out of the situation, immobilized by injury or illness, or simply severely diminished in cognitive and physical capabilities by the cold, intervention will likely be your last option. If someone knows where you are it might help. If found and not unconscious, your would-be rescuer would as part of their backcountry medical response “Feed” you, “Heat” you, and “Beat” you — “Feed” meaning to provide a warm drink like warm Jello and maybe some easy to ingest foods like honey; “Heat” meaning to provide warmth and/or layers and insulation (but not offering themselves as that may very well make two people cold); and “Beat” meaning to get you moving, to exercise, even hike if possible.
Sheltering
Snow, especially the fresh stuff, contains a lot of air. Sure, it’s air trapped in ice crystals, but it’s air nonetheless. There have been times guiding when we weren’t able to move as we normally would have liked to, as expected, and our feet would starting getting cold. If this happened, we would literally stand in deeper snow. The windchill’s effect on the boot was negated while standing in a foot of powder. This was actually a great way to provide some real warmth. This can be done with more than the feet, although ideally you would be able to actually dig a snow cave with an opening for fresh air, a sump or deep foot well for trapping cold air, and a raised platform (snow with a sleeping pad) to rest upon in the warmer upper half of the structure. This, however, is a bit outside the scope of this article.
Another option for sheltering would be to hike prepared with items like a sleeping pad, a sleeping bag or quilt, and a bivy, tarp, or tent. A Bothy Bag is a good option for erecting a fast shelter above treeline. These items add weight to the kit, but they could save your life. Be sure to know how they pack/unpack, set-up, etc., even practice with gloves. Gear is worthless if you can’t get to it or use it when needed. During these times you would have to bring your A-game so try to be ready for it.
Provision of Warmth
In addition to all of that this article covers, adding warmth in our lives may be possible. A non-alcohol cook stove, candle, or any controlled source of flame may be used in a ventilated shelter. Due to the need for ventilation, however, this option isn’t necessarily ideal.
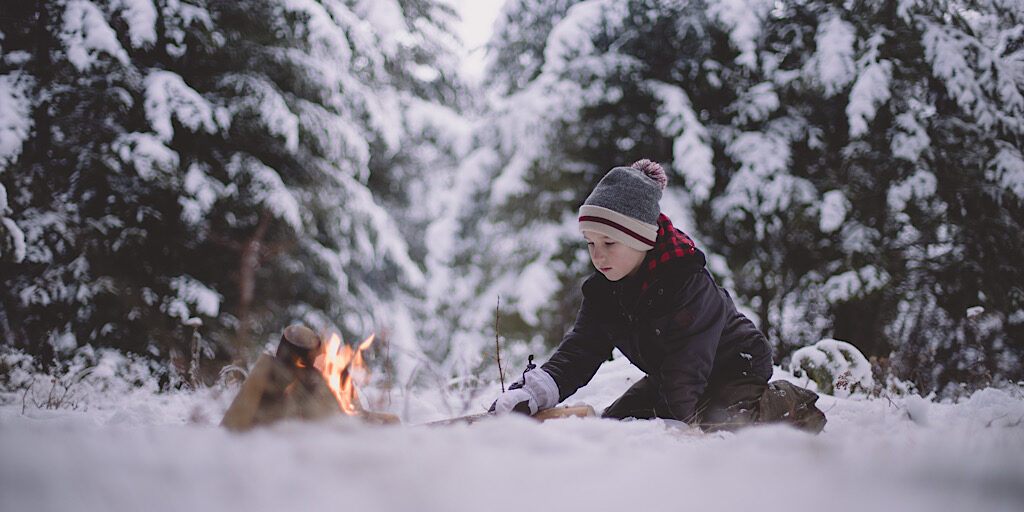
External to your shelter or snow cave, and built at a suitable distance away, a camp fire can be a blessing providing not just physical warmth from the flames, but also by the heat generated during its creation and continued fueling. Moreover, a campfire buoys the morale, it soothes, and this is a benefit not to be overlooked.
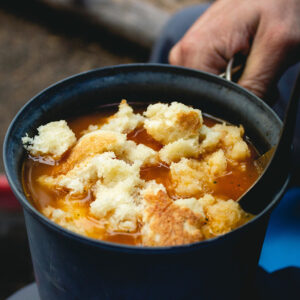
Options in an unventilated structure might include the use of hot packs or a chemical stove such as the “flameless ration heaters” (FRHs) used to heat the entree portion in the military’s “Meals, Ready-to-Eat” (MREs). These simple units create significant heat enough to almost boil water and make that make Jello or other hot drink we mentioned.
Avoidance
 Not hiking in the winter is one sure fire way to not die from hiking in the winter. That said, you won’t get to experience all the other cool things hiking in the winter brings to the table. For instance, hiking in the winter doesn’t just heat you for the day. The affect lingers adding warmth to our bodies well after the hike. Those who winter hike know that to stay warm throughout the winter all you have to do is get out and play in it, a lot. Otherwise you sit at home in a room that is allegedly 68-degrees freezing your butt off.
Winter hiking is beautiful. In terms of crowds there are fewer. It’s quiet when it’s not crunchy. It’s to experience deep warmth in the cold, a comfort enjoyed like no other when all systems are running smoothly. So, in the grand scheme of things, if you want to stay warm, in the words of fellow hiker Ken Bennett, “keep hiking.” We would just add that you need be prepared and have a plan.
You need to get it right — otherwise the winter can hurt.